How to Put Ribbon on a Christmas Tree (Without Losing Your Mind or Your Festive Spirit)
So, it’s finally that time of year again—the sparkle season! 🎄 The air smells like cinnamon, Mariah Carey is unthawing somewhere, and you’re staring at your Christmas tree thinking, “Okay… now how do I make this thing look Pinterest-worthy without it turning into a tangled ribbon disaster?” Been there. Many times.

I’ve spent way too many December nights fighting with wired ribbon, untangling bows, and wondering why my tree looked like a toddler wrapped it. But good news: I’ve cracked the code. Today, I’ll walk you through how to put ribbon on a Christmas tree like a pro—without losing your holiday cheer (or your sanity).
Grab your cocoa (spiked or not, no judgment 😜), and let’s get this tree glowing.
Why Adding Ribbon to Your Christmas Tree is a Total Game-Changer
Let’s be real—ribbon doesn’t just fill gaps; it transforms your tree from “Oh, cute!” to “OMG, did you hire a decorator?”
Here’s why ribbon matters:
- It adds depth and texture. Or in human terms—it makes your tree look lush, not flat.
- It ties your theme together. Whether you’re going for cozy farmhouse vibes or full-on glam, ribbon is the glue (well, metaphorically).
- It’s cheaper than ornaments. IMO, this is the real winner. You can reuse ribbon year after year instead of buying 100 new baubles.
- It hides the ugly stuff. Those bald spots? Gone. Those visible wires? Hidden. Ribbon is like the concealer of Christmas décor.
Ever noticed how professional trees in malls or magazines have that “finished” look? That’s the ribbon magic.
Choosing the Right Ribbon (Yes, It Matters More Than You Think)
You can’t just grab any random spool from the craft aisle and expect miracles. The type of ribbon you use can make or break your tree’s entire vibe.
1. Wired Ribbon Is Your BFF
Non-wired ribbon is like trying to curl hair without hairspray—it flops. Wired ribbon holds shape, which means you can twist, tuck, and fluff it however you like. It’s forgiving, flexible, and fabulous.
2. Width: Go Big or Go Home
For a standard 7- to 8-foot tree, 2.5 to 4 inches wide is perfect. Want drama? Go for 6-inch ribbon. Want something dainty? Stick to 1.5 inches. You can even mix widths for extra flair.
3. Pattern Play
- Plaid or burlap → Cozy farmhouse.
- Velvet or metallic → Elegant and glam.
- Sheer with sparkle → Classic and bright.
Just don’t overdo it. Mixing three patterns is the max before your tree starts screaming, “Too much caffeine!”
4. Quantity (How Much Ribbon Do You Actually Need?)
A good rule of thumb: 9–10 feet of ribbon per foot of tree height.
So if your tree is 7 feet tall, you’ll want about 70 feet of ribbon. Yeah, it sounds like a lot—but trust me, you’ll use it.
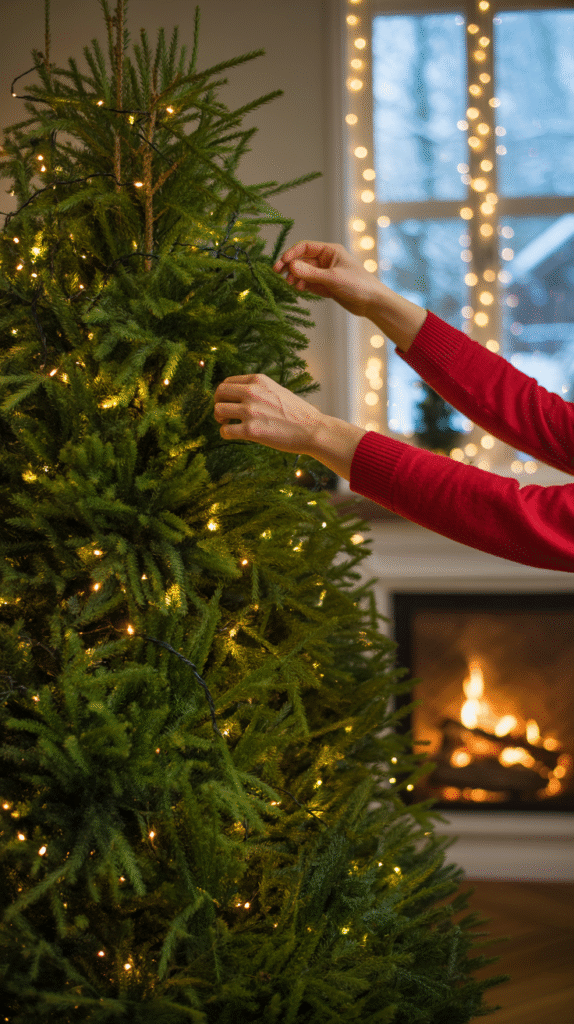
Prepping the Tree: Because You Don’t Want to Decorate Over Chaos
Before you start, fluff that tree. Seriously. Whether it’s real or artificial, take time to separate every branch. It’s tedious, but it makes all the difference.
Then add your lights first. Ribbon goes after lights but before ornaments. This order gives you structure to work with and helps the ribbon reflect the glow beautifully.
Pro Tip: Step back every now and then while you work. What looks good up close can sometimes look like spaghetti from across the room.
How to Put Ribbon on a Christmas Tree (The Foolproof Ways)
Okay, here’s where the fun begins! There’s no single “right” way, but I’ll show you the top methods decorators actually use—and which one might fit your style best.
🎀 Method 1: The Classic Cascade (A.K.A. Waterfall Ribbon)
If you’ve seen those stunning trees with ribbon gracefully flowing down from the top like a waterfall—this is it.

How to Do It:
- Cut your ribbon into 3–4-foot pieces. Don’t use one long continuous strip. It’s way easier to control shorter sections.
- Start near the top of the tree and tuck the end deep into the branches.
- Let it cascade down in a loose wave, gently tucking every 8–10 inches.
- Repeat around the tree, spacing evenly.
Pro Tip: Twist the ribbon as you go to show off both sides (especially if it’s double-sided).
Why It Works: It looks effortless and natural, like the ribbon just fell there perfectly.
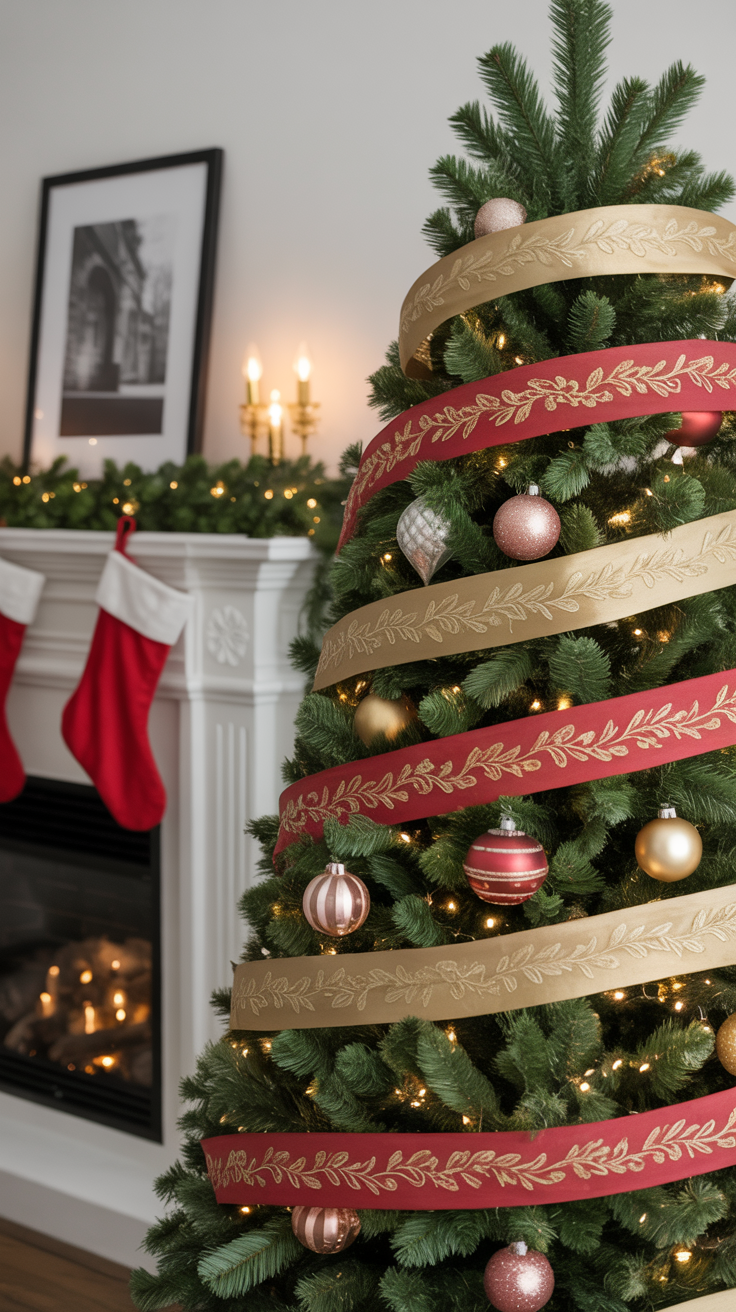
🎁 Method 2: The Spiral Wrap (For That Perfectly Organized Look)
This one’s neat, symmetrical, and ideal if you love a designer-style tree.
How to Do It:
- Start at the top (again, tuck in the end).
- Wrap the ribbon diagonally around the tree in a spiral pattern, maintaining equal spacing.
- Secure every couple of feet by tucking into branches.
Bonus: Try using two different ribbons side by side—one solid, one patterned. It creates serious visual interest.
My Take: Great for perfectionists. Not so great if you’re more of a “throw tinsel and call it done” kind of person.
🎉 Method 3: The Random Loops (AKA Organized Chaos)
If you like a more whimsical, free-flowing style, this is your jam.

How to Do It:
- Cut ribbon into 18–24-inch pieces.
- Tuck one end deep into the tree.
- Create a loop, pinch it, and tuck again. Keep looping and tucking until it feels right.
This gives a puffy, textured look—like the ribbon is woven through the branches.
Tip: Mix in two or three ribbons of different textures (say, satin, burlap, and glitter) for a rich layered look.
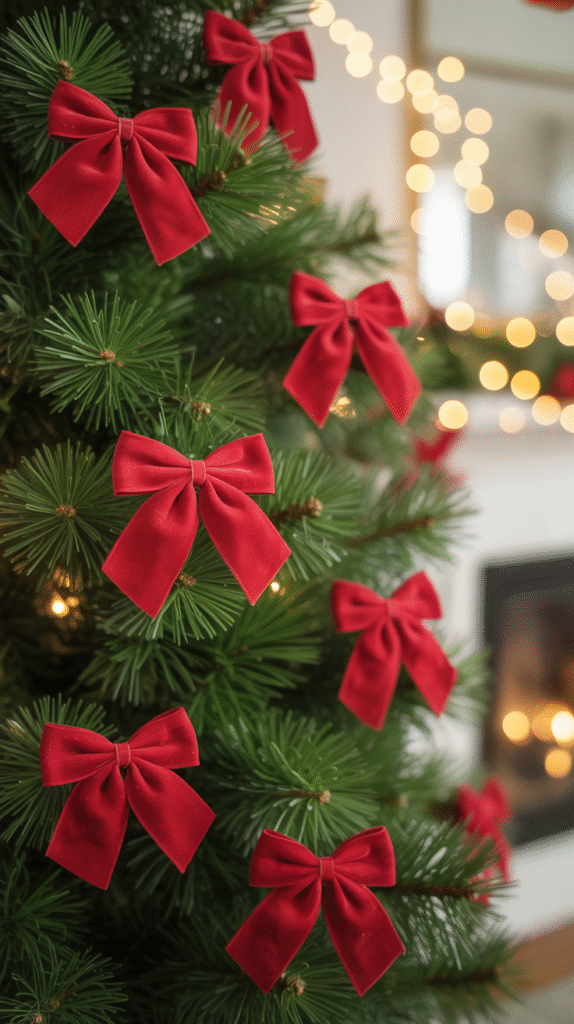
🪄 Method 4: Ribbon Bows Everywhere
Okay, this one is adorable. Perfect for smaller trees, entryway trees, or if you’re going for a cute “cottagecore Christmas” vibe.
How to Do It:
- Make a ton of bows (Netflix + bow-making night, anyone?).
- Attach them directly to branches using floral wire or ornament hooks.
- Mix big and small bows for variety.
You can even alternate colors—like red velvet and gold—to make your tree pop.
🌟 Method 5: The Layered Look (Professional Decorator Trick)
Here’s what most pros do, though they rarely tell you: they layer ribbons for depth.
Here’s the breakdown:
- Start with a base ribbon (solid, wide, usually 4–6 inches).
- Add a secondary accent ribbon (narrower, patterned, maybe sparkly).
- Overlap them slightly as you tuck them in together.
The result? A tree that looks expensive, even if your ribbons came from the discount bin.
Mixing Ribbons Like a Pro
The secret sauce behind a show-stopping tree isn’t just what ribbon you use—it’s how you combine them.
Here’s a quick cheat sheet:
- Two contrasting textures (like velvet + metallic) always win.
- Avoid mixing more than three patterns. Chaos isn’t cute.
- Use balance. If one side of your tree has lots of sparkle, keep the opposite side calmer.
Ever walked into a store and thought, “Wow, that tree looks alive”? That’s because pros mix ribbon strategically—not randomly.
Common Mistakes (and How to Avoid Them)
Because yes, even the most festive among us make mistakes. I’ve made all of these—so learn from my glittery regrets.
1. Using One Long Ribbon
Don’t do it. You’ll cry. Long ribbons tangle, droop, and are impossible to adjust. Always cut into shorter sections.
2. Ignoring Proportions
Tiny ribbon on a 9-foot tree looks sad. Massive ribbon on a mini tree looks like it’s being eaten alive. Match your ribbon size to your tree.
3. Forgetting Depth
If you only drape ribbon on the surface, it’ll look flat. Tuck it in and out of branches for a natural, layered look.
4. Overdecorating
Yes, there is such a thing as too much ribbon. If your tree starts looking like it belongs in Vegas, take a step back.
5. Forgetting to Fluff
Fluff the ribbon after you place it! Adjust loops, fix twists, and step back frequently.
Decorating Around Your Ribbon
Once your ribbon’s in place, you can finally bring out the fun stuff—ornaments, garlands, and toppers.

My go-to order:
- Ribbon
- Large statement ornaments
- Medium ornaments
- Filler ornaments
- Picks and sprigs
Ribbon acts as the backbone, and everything else enhances it. Try to keep ornaments evenly spaced so your ribbon remains visible.
Pro Styling Tips You’ll Actually Use
Tip #1: Work in Sections
Split your tree into three vertical zones. Decorate one section fully before moving to the next. This keeps your ribbon flow consistent.
Tip #2: Step Back Often
Take photos from a distance (yes, your phone camera counts). It helps you see the overall balance and fix uneven areas.
Tip #3: Combine Ribbon with Other Elements
Mix in beaded garlands, floral picks, or eucalyptus stems alongside your ribbon. It adds natural texture and makes your design feel intentional.
Tip #4: Anchor with the Topper
Your topper should complement your ribbon. If you’ve got gold ribbon, choose a topper with gold tones or soft metallics for cohesion.

My Personal Setup (Because You Asked 😉)
Every year, I do a different theme—but ribbon always plays the starring role. Last year, I went full Nordic cozy: cream velvet ribbon layered with burlap, cinnamon sticks tucked in the branches, and a plaid bow on top. Simple, warm, and smelled amazing.
The year before? Total glam—rose gold mesh ribbon spiraling down like a glitter tornado. My living room looked like a Hallmark movie threw up on it (and I loved every second).
The point is: once you learn the ribbon techniques, you can tweak them for any aesthetic.
Troubleshooting Ribbon Problems (Because It Happens)
Problem: Ribbon keeps slipping.
Fix: Use small green twist ties or floral wire to anchor it invisibly.
Problem: Ribbon looks stiff and unnatural.
Fix: Loosen your tucks. Ribbon should flow, not strangle the tree.
Problem: Ran out halfway down the tree.
Fix: Pretend it’s intentional 😅. Just use complementary ribbon to fill the lower half—it often looks even better!
Storage Tips (So You Don’t Curse Yourself Next Year)
When the holidays end, you’ll thank yourself for doing this right.
- Roll, don’t fold. Keeps it smooth.
- Store in a clear bin so you can see the colors next year.
- Label by theme. (Yes, “Farmhouse 2025” is totally a valid label.)
FYI, wired ribbon can last years if stored properly. Mine from 2018 still looks brand new.
DIY Ribbon Ideas for Extra Flair
Feeling crafty? You can totally DIY custom ribbons if store-bought ones aren’t cutting it.
- Painted burlap: Use metallic paint or stencils.
- Layered ribbon: Sew two different ribbons together for a custom combo.
- Printed words: Iron-on vinyl works great for phrases like “Merry & Bright.”
These add that personalized touch—and make your guests say, “Wait, you MADE that?”

Final Thoughts: You’ve Got This, Sparkle Warrior ✨
Decorating your Christmas tree with ribbon isn’t just about aesthetics—it’s about creating vibes. It’s cozy evenings, holiday playlists, and cocoa mugs while you tweak the perfect loop.
Remember: there’s no “wrong” way to do it. As long as it makes you happy (and doesn’t resemble a ribbon explosion), you’ve nailed it.
So, grab your scissors, fluff that tree, and go full festive mode. You’ll be amazed how a few strips of ribbon can make your entire living room glow.
Happy decorating, friend—and may your ribbon always cooperate this year. 😉